This post was published in 2017 and may contain information, techniques or code examples that are no longer current. Please double-check official documentation and modern best practices before using anything from this article.
Magento makes it really easy to expand the usual product attributes through the Admin Panel. While these can be added to the product page in the standard attribute list table, you may want your attribute to appear differently or use it for another feature. This post explains how.
In this example we’ll be adding an attribute to tell the customer how long they might have to wait on a product to arrive.
Create a new Attribute
Click into Catalog > Attributes > Manage Attributes. Click on Add New Attribute
- Attribute Code: delivery_lead_time
- Scope: Global (this means the value of the attribute will be shared across store views if applicable)
- Catalog Input Type for Store Owner: Dropdown
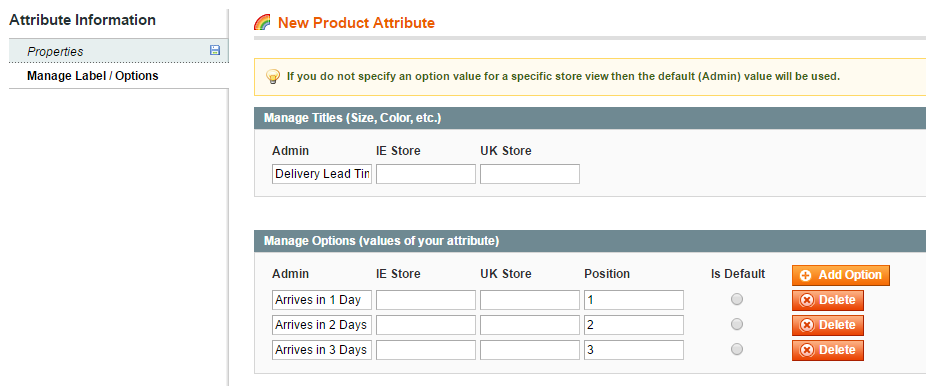
The other values can be left as default. Next click into the Manage Label/Options tab
Set the value for “admin” to be the human readable form or the attribute name “Delivery Lead Time”, then below add the options that you want to display…
Update the attribute set
In Catalog > Attributes > Manage Attribute Sets click into the attribute set (oftentimes the one labelled “Default”).
The new attribute will be listed in the “Unassigned Attributes” section on the right hand side of the page. Drag and drop your attribute into the Groups column in the middle of the page. These groups are the tabbed sections that appear on the product edit view. Once you have placed and ordered your new attribute click Save Attribute.
Update the product
Your new attribute will now appear in the product edit view, depending on where it was placed in the attribute set.
It will also be available to update through the batch product editor.
Add the new attribute to the front end
The attribute can then be loaded onto the product page using the following code. First check if the attribute has been set, if it has add the value into a container.
<?php if  ($_product->getAttributeText('delivery_lead_time')): ?>
    <div class="lead-time"><?php echo $_product->getAttributeText('delivery_lead_time'); ?><div>
<?php endif; ?>
More Magento posts
—
Magento database structure
The database structure of Magento is designed to store and manage various aspects of an e-commerce website, including products, orders, customers, and more. Understanding the Magento database structure is crucial…
—
Accessibility in ecommerce websites
In the digital age, where online shopping has become an integral part of our lives, ecommerce websites hold the key to business success. Amidst the rush to create visually appealing…
—
Using Magento to get small businesses online
For small businesses aiming to establish a formidable online presence and drive sales, Magento emerges as a powerful e-commerce platform offering a suite of features tailored to their needs. Scalability…
Continue reading "Using Magento to get small businesses online"
—
How can I speed-up my Magento website?
Speed optimisation is crucial for a Magento website as it directly impacts user experience, conversions, and search engine rankings. You should prepare your server so it is set-up to use…
